No products in the cart.
As someone who has spent years pouring, testing, and perfecting candles, I’ve had my fair share of wax spills on wood floors, tiles, and even carpet. Candle wax, once cooled, clings stubbornly to surfaces.
Regular mopping doesn’t remove it because wax repels water. Over time, that residue attracts dust, leaving a dull, greasy patch.
The good news is that removing wax isn’t difficult once you understand how it behaves.
The right mix of temperature control, patience, and gentle cleaning restores your floor without leaving a trace.
Tools or Preparation Needed
Before starting, prepare your space and gather the right materials. A good setup prevents spreading melted wax and saves time.
Below is what I always keep in my workshop and at home for quick wax clean-ups:
- Plastic scraper or old credit card – helps lift hardened wax without scratching delicate finishes.
- Microfiber cloth or absorbent paper towels – ideal for wiping soft wax or polishing the cleaned area.
- Ice cubes in a zip-lock bag – used to freeze and harden the wax quickly before scraping.
- Hair dryer or iron – to soften residual wax for easy blotting.
- Brown paper or parchment sheet – absorbs melted wax when heated.
- Mild cleaner – a pH-balanced wood cleaner or a simple vinegar-water mix works best.
- Soft brush and gloves – protect hands and help in cleaning textured surfaces like grout or vinyl grooves.
From experience, preparation is the key to preventing surface damage. Always test a cleaner on a small, hidden patch before applying it widely.
Remove Wax from Wood Floors
Wood floors bring warmth and texture to any room, but they’re also vulnerable to scratches and stains. Wax spills can dull their shine or seep into the grain if not handled correctly.
I learned this during a production session with beeswax candles when a few drops solidified on my oak flooring. My instinct was to scrape it off immediately, but that only spread the residue. What worked was a method based on temperature control.
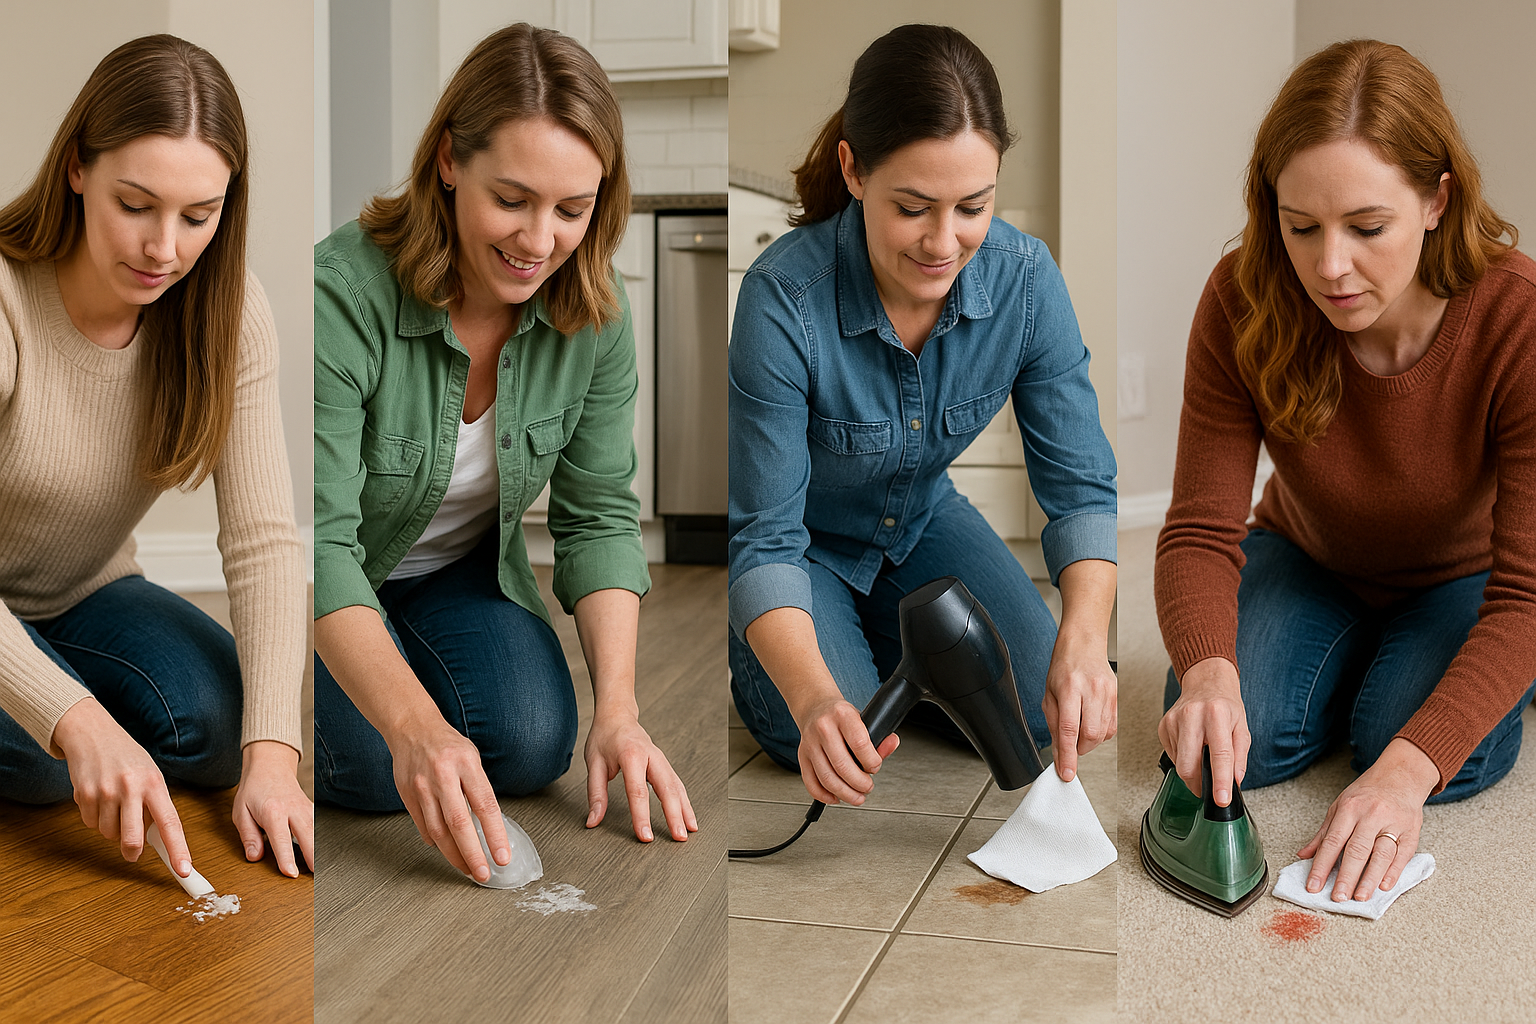
Start by hardening the wax. Place an ice-filled zip-lock bag over the spill for a few minutes. Once the wax becomes brittle, lift it gently using a plastic scraper or an old card. Avoid knives or blades; even minor pressure can damage the finish.
After removing most of the wax, you’ll likely see a thin, greasy layer. That’s normal because wax contains oils that resist cold removal.
Now, soften the residue using mild heat. Set your hair dryer to a low temperature and direct it at the spot for ten seconds. As the wax softens, wipe it away with a clean paper towel or soft cloth.
If you prefer a traditional method, place a sheet of brown paper over the wax and run a warm iron across it for a few seconds. The paper will absorb the melted wax instantly.
Finally, clean the area using a small amount of wood-safe floor cleaner or diluted vinegar. Buff with a dry microfiber cloth to restore the natural sheen.
If your flooring is untreated wood, apply a touch of linseed oil or beeswax-based polish to recondition it. This not only revives the grain but also prevents dull patches caused by heat exposure.
Wood reacts sensitively to excess moisture, so always keep water use minimum. The aim is to restore the floor’s luster, not strip its protective finish. After a few attempts, you’ll notice the process becomes effortless.
Get Wax Off Vinyl and Tile Floors
Vinyl and tile surfaces are easier to handle since they don’t absorb wax like porous materials. Still, melted wax can cling to textured surfaces or settle in grout lines, which can be tricky if left untouched for long.
In my candle studio, I once dropped molten paraffin on a vinyl panel, and the trick that worked best was gradual softening.
Begin by softening the wax with a hair dryer or a towel soaked in warm water. Once it looks glossy, blot it immediately with a paper towel or a clean rag.
Replace the cloth as it absorbs more wax. This step prevents smearing and ensures residue lifts evenly.
If stubborn traces remain, mix one part vinegar with three parts warm water and apply it using a soft sponge. The mild acid in vinegar breaks down the oily component of wax, restoring the original finish.
For wax trapped in grout lines, apply a paste of baking soda and water, scrub gently with a soft toothbrush, and rinse. It not only cleans the wax but also brightens grout.
Avoid harsh abrasives, steel wool, or acetone-based cleaners. These can dull the shine or discolor the flooring, especially on glossy vinyl. Always dry the surface after cleaning to prevent streaks or slippery patches.
What makes vinyl and tile forgiving is their resilience, but improper cleaning can still cause dulling over time.
So after removing wax, give the area a quick polish using a mild pH-neutral cleaner to restore the surface gloss.
In my experience, this method works even for pigmented waxes like red or blue, which tend to leave a faint tint on lighter tiles. The key is timing clean spills as soon as possible before the wax bonds tightly.
Wax Removal for Carpet Floors
Carpets are the trickiest surface when it comes to wax spills. Fibers absorb heat and hold color, so the wax sets fast. I discovered this the hard way when working with a batch of colored soy wax.
A single spill turned into a pink patch on my beige rug. Fortunately, after a few trials, I found a reliable way to remove wax from carpet without damaging the fibers.
The process begins with freezing the wax. Place an ice pack or ice-filled bag over the area for several minutes. Once hardened, break and lift the wax gently using a dull knife or spoon.
Avoid pressing down; the goal is to lift, not grind the wax deeper. After removing the larger chunks, a thin residue usually remains on the fibers.
Next, apply controlled heat. Lay a piece of brown paper or a clean towel over the remaining wax. Run a warm iron across it in short strokes. As the wax softens, it will transfer to the paper.
Replace the paper as needed until the spot appears clean. A hair dryer can work too, especially for smaller spills or synthetic carpets that respond poorly to direct heat.
Once all visible wax is gone, clean the area using a mild carpet-safe detergent mixed with warm water. Blot, don’t rub. This step removes leftover oils or dye pigments.
Finish by drying the area with a clean cloth and allowing it to air out completely. Afterward, a quick vacuum helps restore the carpet’s natural texture.
If the wax was scented or colored, you might notice a faint odor or tint. In that case, sprinkle a small amount of baking soda, let it sit for fifteen minutes, and vacuum again. It neutralizes the scent and absorbs residual moisture.
I’ve used this approach repeatedly during candle-testing phases, and it has always restored the carpet’s freshness.
Final Thoughts
Wax spills are part of the candle experience, but with the right approach, your floors can look spotless again.
Whether on wood, vinyl, tile, or carpet, the principle remains the same: control temperature, lift gently, and clean residue safely. The process becomes second nature once you’ve done it a few times.
As someone who crafts candles daily, I’ve learned that prevention helps most—use trays under candles, trim wicks to avoid drips, and always place them on heat-resistant surfaces.
When accidents happen, stay calm, follow these steps, and your floors will stay as beautiful as your candlelight.
If you love candles but prefer enjoying them without the cleanup, explore Karigar Style’s handmade candle collection.


