No products in the cart.
If you’ve ever lit a candle and noticed it burning straight down the middle while the wax on the sides remains untouched, you’ve run into candle tunneling.
It not only wastes wax but also shortens the candle’s lifespan and weakens the fragrance.
This blog is a complete guide to understanding candle tunneling. You’ll learn what it is, why it happens, how to fix it if your candle has already tunneled, and the exact steps you can take to prevent it from happening again.
By the end, you’ll know how to burn candles properly, extend their life, and enjoy every bit of fragrance they are meant to give.
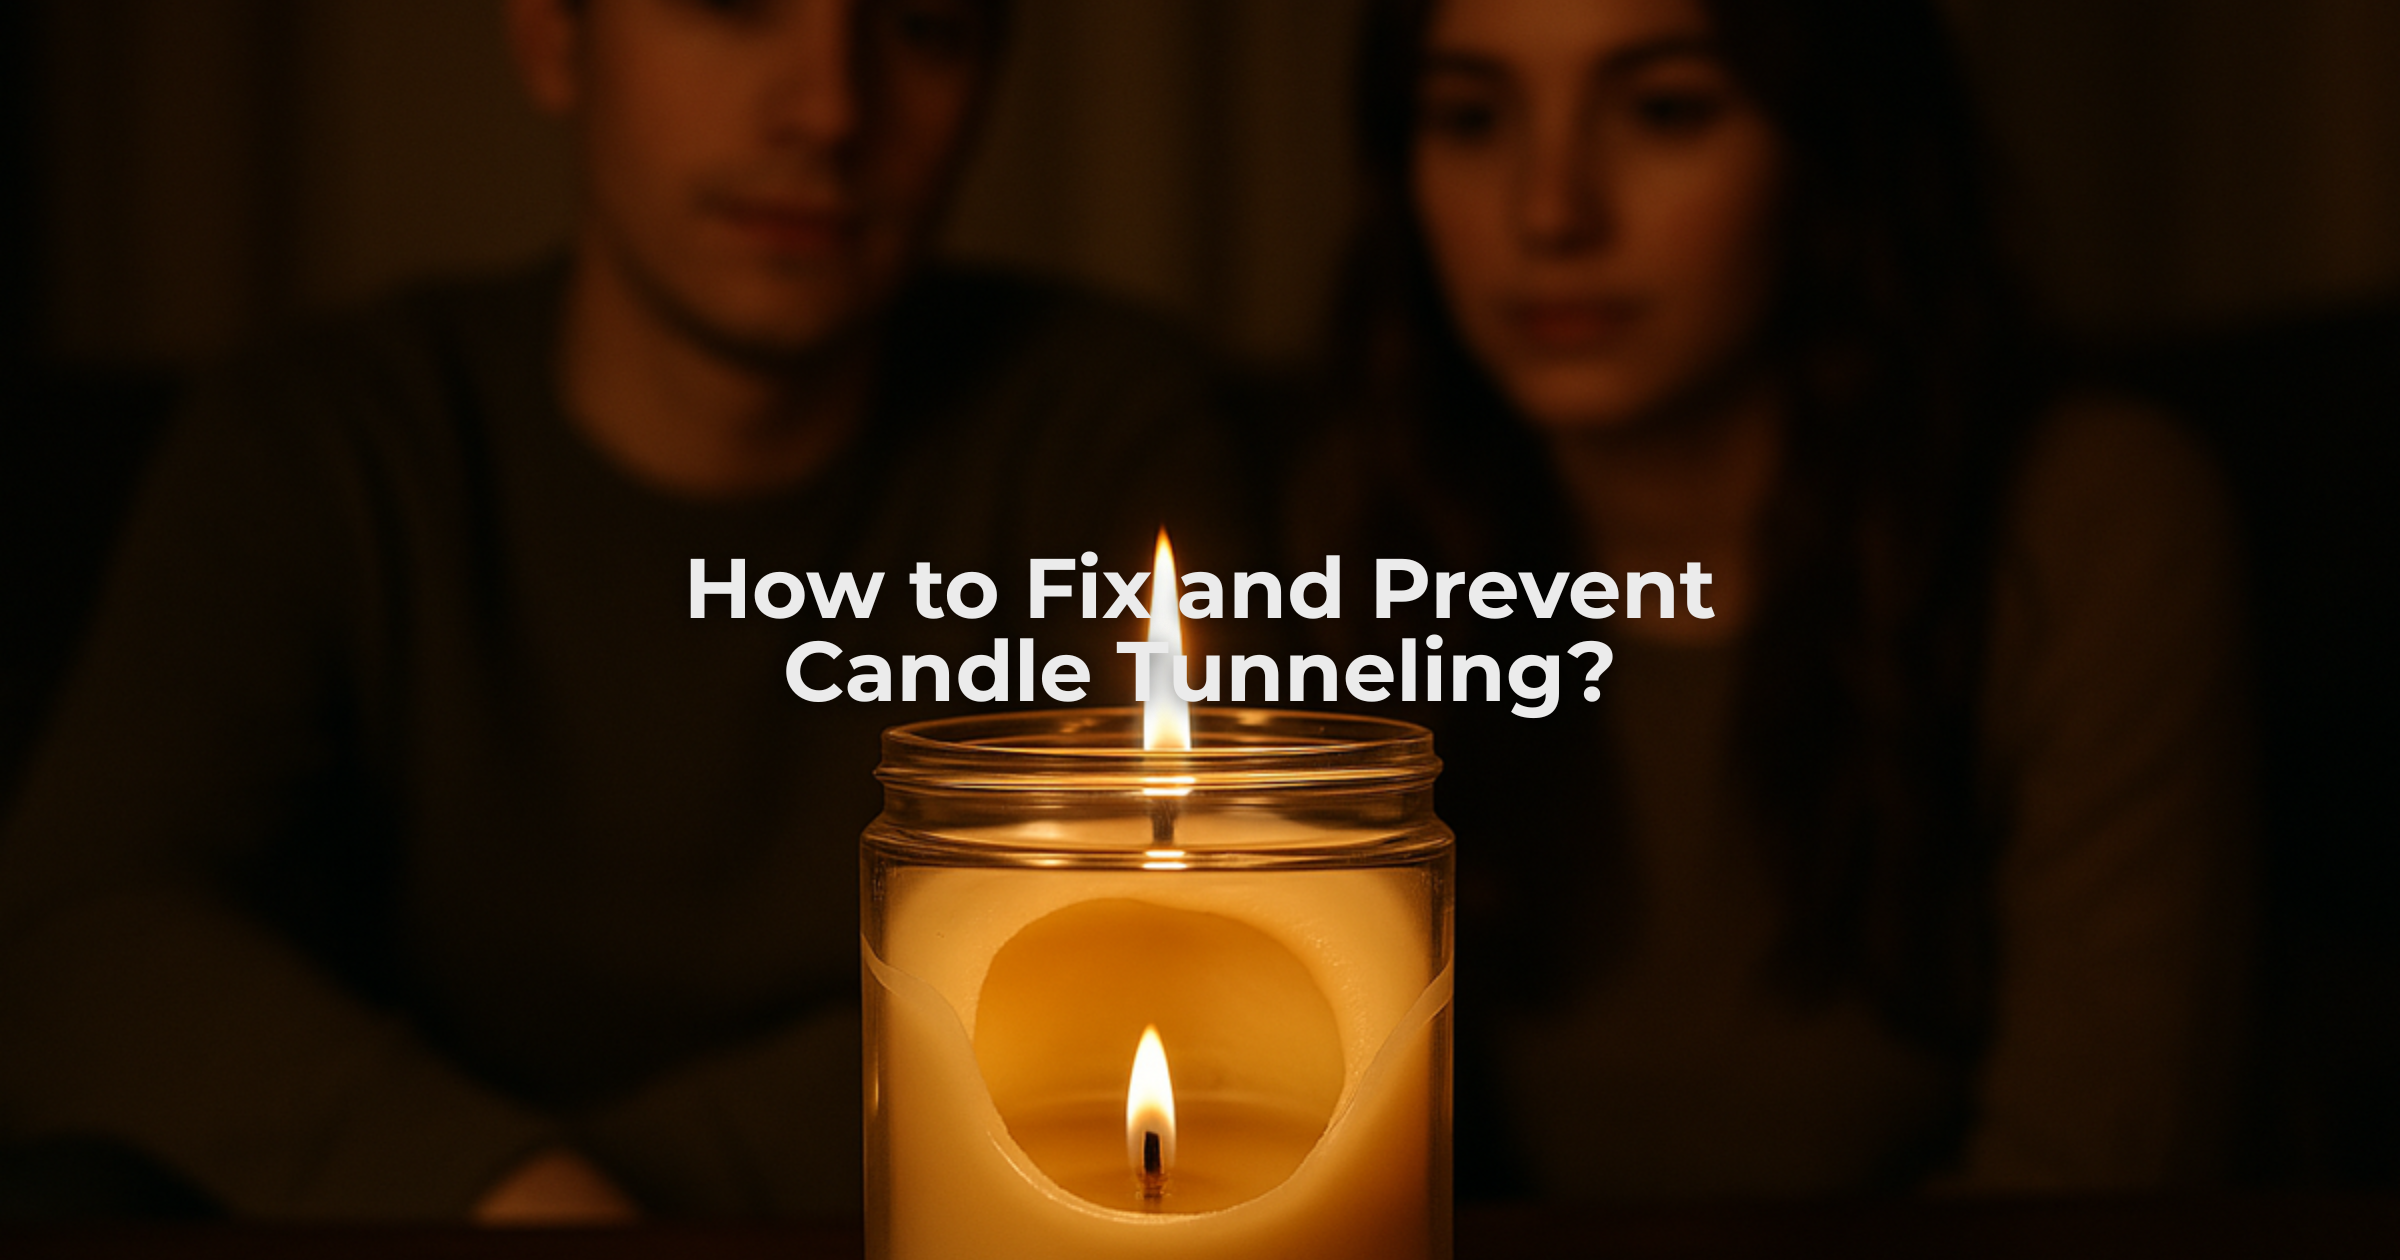
What is Candle Tunneling?
Candle tunneling happens when the wax melts straight down the center instead of forming an even wax pool across the surface. This leaves a thick ring of unused wax around the jar, shortens burn time, weakens fragrance throw, and affects the candle’s appearance.
Why Does Candle Tunneling Happen?
The main cause is something called burn memory. If you extinguish a candle too soon during the first burn, the wax “remembers” and continues to melt only in that narrow path.
Other factors also play a role:
- A wick that is too small for the container cannot create enough heat distribution.
- Draft sensitivity, such as air from windows or fans, makes the flame lean and causes uneven wax melting.
- Wax type matters too. Soy and beeswax candles burn differently from paraffin wax, and some designs, like three-wick or wood wick candles, show tunneling in unique ways.
I’ve seen this issue most often in narrow glass containers with cotton wicks, especially when the wick isn’t trimmed or burn times are too short.
Once tunneling starts, fragrance oils release unevenly, and the candle loses its intended performance.
Can You Fix Candle Tunneling?
Yes. Tunneling can be corrected at home with simple methods like the aluminum foil fix, a hair dryer, or candle warmers. These techniques help even out candle wax and restore performance.
However, prevention is always better, which is why following the first burn candle rule and proper candle care ensures your candles burn evenly for a long time from the start.
How to Fix Candle Tunnelings
When I first started learning candle making, I thought a tunneled candle was a lost cause. Over time, I discovered a few reliable tunneling repair methods that actually work.
These techniques can rescue most candles, whether they are soy, beeswax, or paraffin wax.
Here are the best ways to fix candle tunneling at home.
1. Aluminum Foil Method
The aluminum foil method is one of the simplest ways to fix uneven candle burning. Wrap a strip of foil around the top of the candle, leaving an opening at the center for the flame.
The foil traps heat inside, allowing the edges of the wax to melt and catch up with the center.
I’ve used this method on glass container candles, and within an hour, the wax pool usually evens out.
It works especially well for candles with mild tunneling where the wick is still accessible. Just remember not to cover the flame completely, as this can reduce oxygen flow.
2. Hair Dryer or Heat Gun Method
If you have a hair dryer or a small heat gun, you can carefully re-melt the uneven wax. Hold the dryer a few inches above the candle surface and move it in circles until the wax pool reaches the edges.
This technique is fast and gives you more control over heat distribution.
I find this method useful when fixing candle tunneling in luxury scented candles, where aesthetics matter.
The surface smooths out beautifully, restoring the candle’s appearance. Just be cautious not to overheat the wax, as different wax types have different burn temperature differences.
3. Candle Warmer Method
For candles with severe tunneling, a candle warmer can be a lifesaver. These devices heat the bottom of the candle jar, melting the wax evenly without lighting the wick.
I’ve used candle warmers to revive soy candles that had tunneled too deeply to burn properly.
While this won’t fix the wick itself, it ensures you still enjoy the fragrance oils and get full value out of the candle.
Candle warmers are also safer for indoor use since there is no open flame.
4. Re-Wick or Repurpose the Candle
Sometimes, tunneling gets so bad that the wick is buried under wax. In that case, you can either re-wick the candle or repurpose the wax.
I’ve melted down leftover wax from tunneled candles and poured it into smaller containers with fresh cotton wicks. You can also turn leftover wax into wax melts for a warmer.
This approach works well for three-wick candles or wood wick candles, where tunneling can cause one wick to drown.
Instead of throwing them away, you still enjoy the fragrance and extend the candle’s lifespan.
How to Prevent Candle Tunneling?
Fixing candle tunneling is possible, but prevention is always better. Over the years, I’ve learned that consistent candle maintenance makes all the difference.
Here are the steps I follow and recommend to anyone who asks me how to burn candles properly.
1. Let the First Burn Create a Full Wax Pool
The first burn sets the stage for the entire candle lifespan. Candle makers call this the wax memory effect, which simply means wax “remembers” how it melted the first time.
Always allow your candle to burn long enough on its first use to create a full wax pool that touches the edges of the container.
As a rule of thumb, let it burn for about one hour per inch of diameter.
For example, if you light a 3-inch soy candle, plan for at least three hours on the first burn. Following this first burn candle rule prevents the dreaded tunnel from forming.
2. Trim the Wick to the Right Length
Wick trimming is one of the most overlooked steps in candle care. A wick that is too long creates high flames and uneven wax melting, while a wick that is too short can drown in its own wax.
I always trim mine to about 1/4 inch before lighting. This small step keeps the flame steady and helps maintain proper candle lighting.
It also prevents wick mushrooming, which not only looks messy but can also affect heat distribution inside the jar.
3. Burn Candles for the Right Duration
Extinguishing a candle too early is one of the quickest ways to cause tunneling. At the same time, letting it burn for too long can overheat the wax and shorten the life of the fragrance oils.
I usually burn my candles for two to four hours at a time. This allows enough time for an even melt while still protecting the wick and scent.
4. Place the Candle in a Draft-Free Area
Even a small draft from an air conditioner or open window can push the flame to one side, leading to uneven wax melting.
I once noticed tunneling in a beeswax candle simply because I had placed it near a fan.
Since then, I make sure my candles sit in a stable, draft-free area where the flame can burn upright.
5. Choose High-Quality Candles
Not all candles are made the same. I’ve tested cheap paraffin wax candles that tunneled no matter how carefully I burned them.
Quality candles with the right wick size and clean-burning ingredients like soy or beeswax perform much better.
Look for candles made with cotton wicks, balanced fragrance oils, and sturdy candle jars or glass containers that allow proper heat circulation.
6. Use Proper Candle Holders and Accessories
Candle holders are not just decorative. The right holder supports airflow and keeps the jar stable, while tools like candle snuffers help you extinguish the flame without creating smoke that can damage the wax surface.
Using these simple accessories is part of good candle care.
Final Thoughts
Candle tunneling can feel disappointing, but it doesn’t mean your favorite candle is ruined.
With simple tunneling repair methods like the foil method, a hair dryer, or a candle warmer, you can often save it.
Always give your candle enough time to form a full wax pool on the first burn, trim the wick before each use, and place it in a draft-free spot. These simple steps extend candle lifespan and keep the fragrance strong.
And if you’re looking for high-quality, well-crafted candles that burn evenly, check out Karigar Style. Choosing the right candle makes all the difference in both performance and experience.


